


Track with a system, not a spreadsheet
Feel like you don’t actually know where your money goes every month? You’re not alone.
The problem isn’t that you don’t track — you do. But it’s ad hoc, scattered across Excel spreadsheets, Apple Notes, Google Drive folders for receipts, and random apps.
As a result, you might get surprised by:
- Bills you weren’t expecting
- Small purchases that quietly add up
- Overspend and go over your budget without realizing it
That’s why you need a clear, simple money-tracking system you can rely on.
And this is the best time to learn how to set up a money tracker for personal finance management.
With the right setup, you can track every expense, see where your money goes, and finally feel in control again.
In this post, you’ll learn how to track expenses in Notion step by step, using databases, dashboards, and custom views.
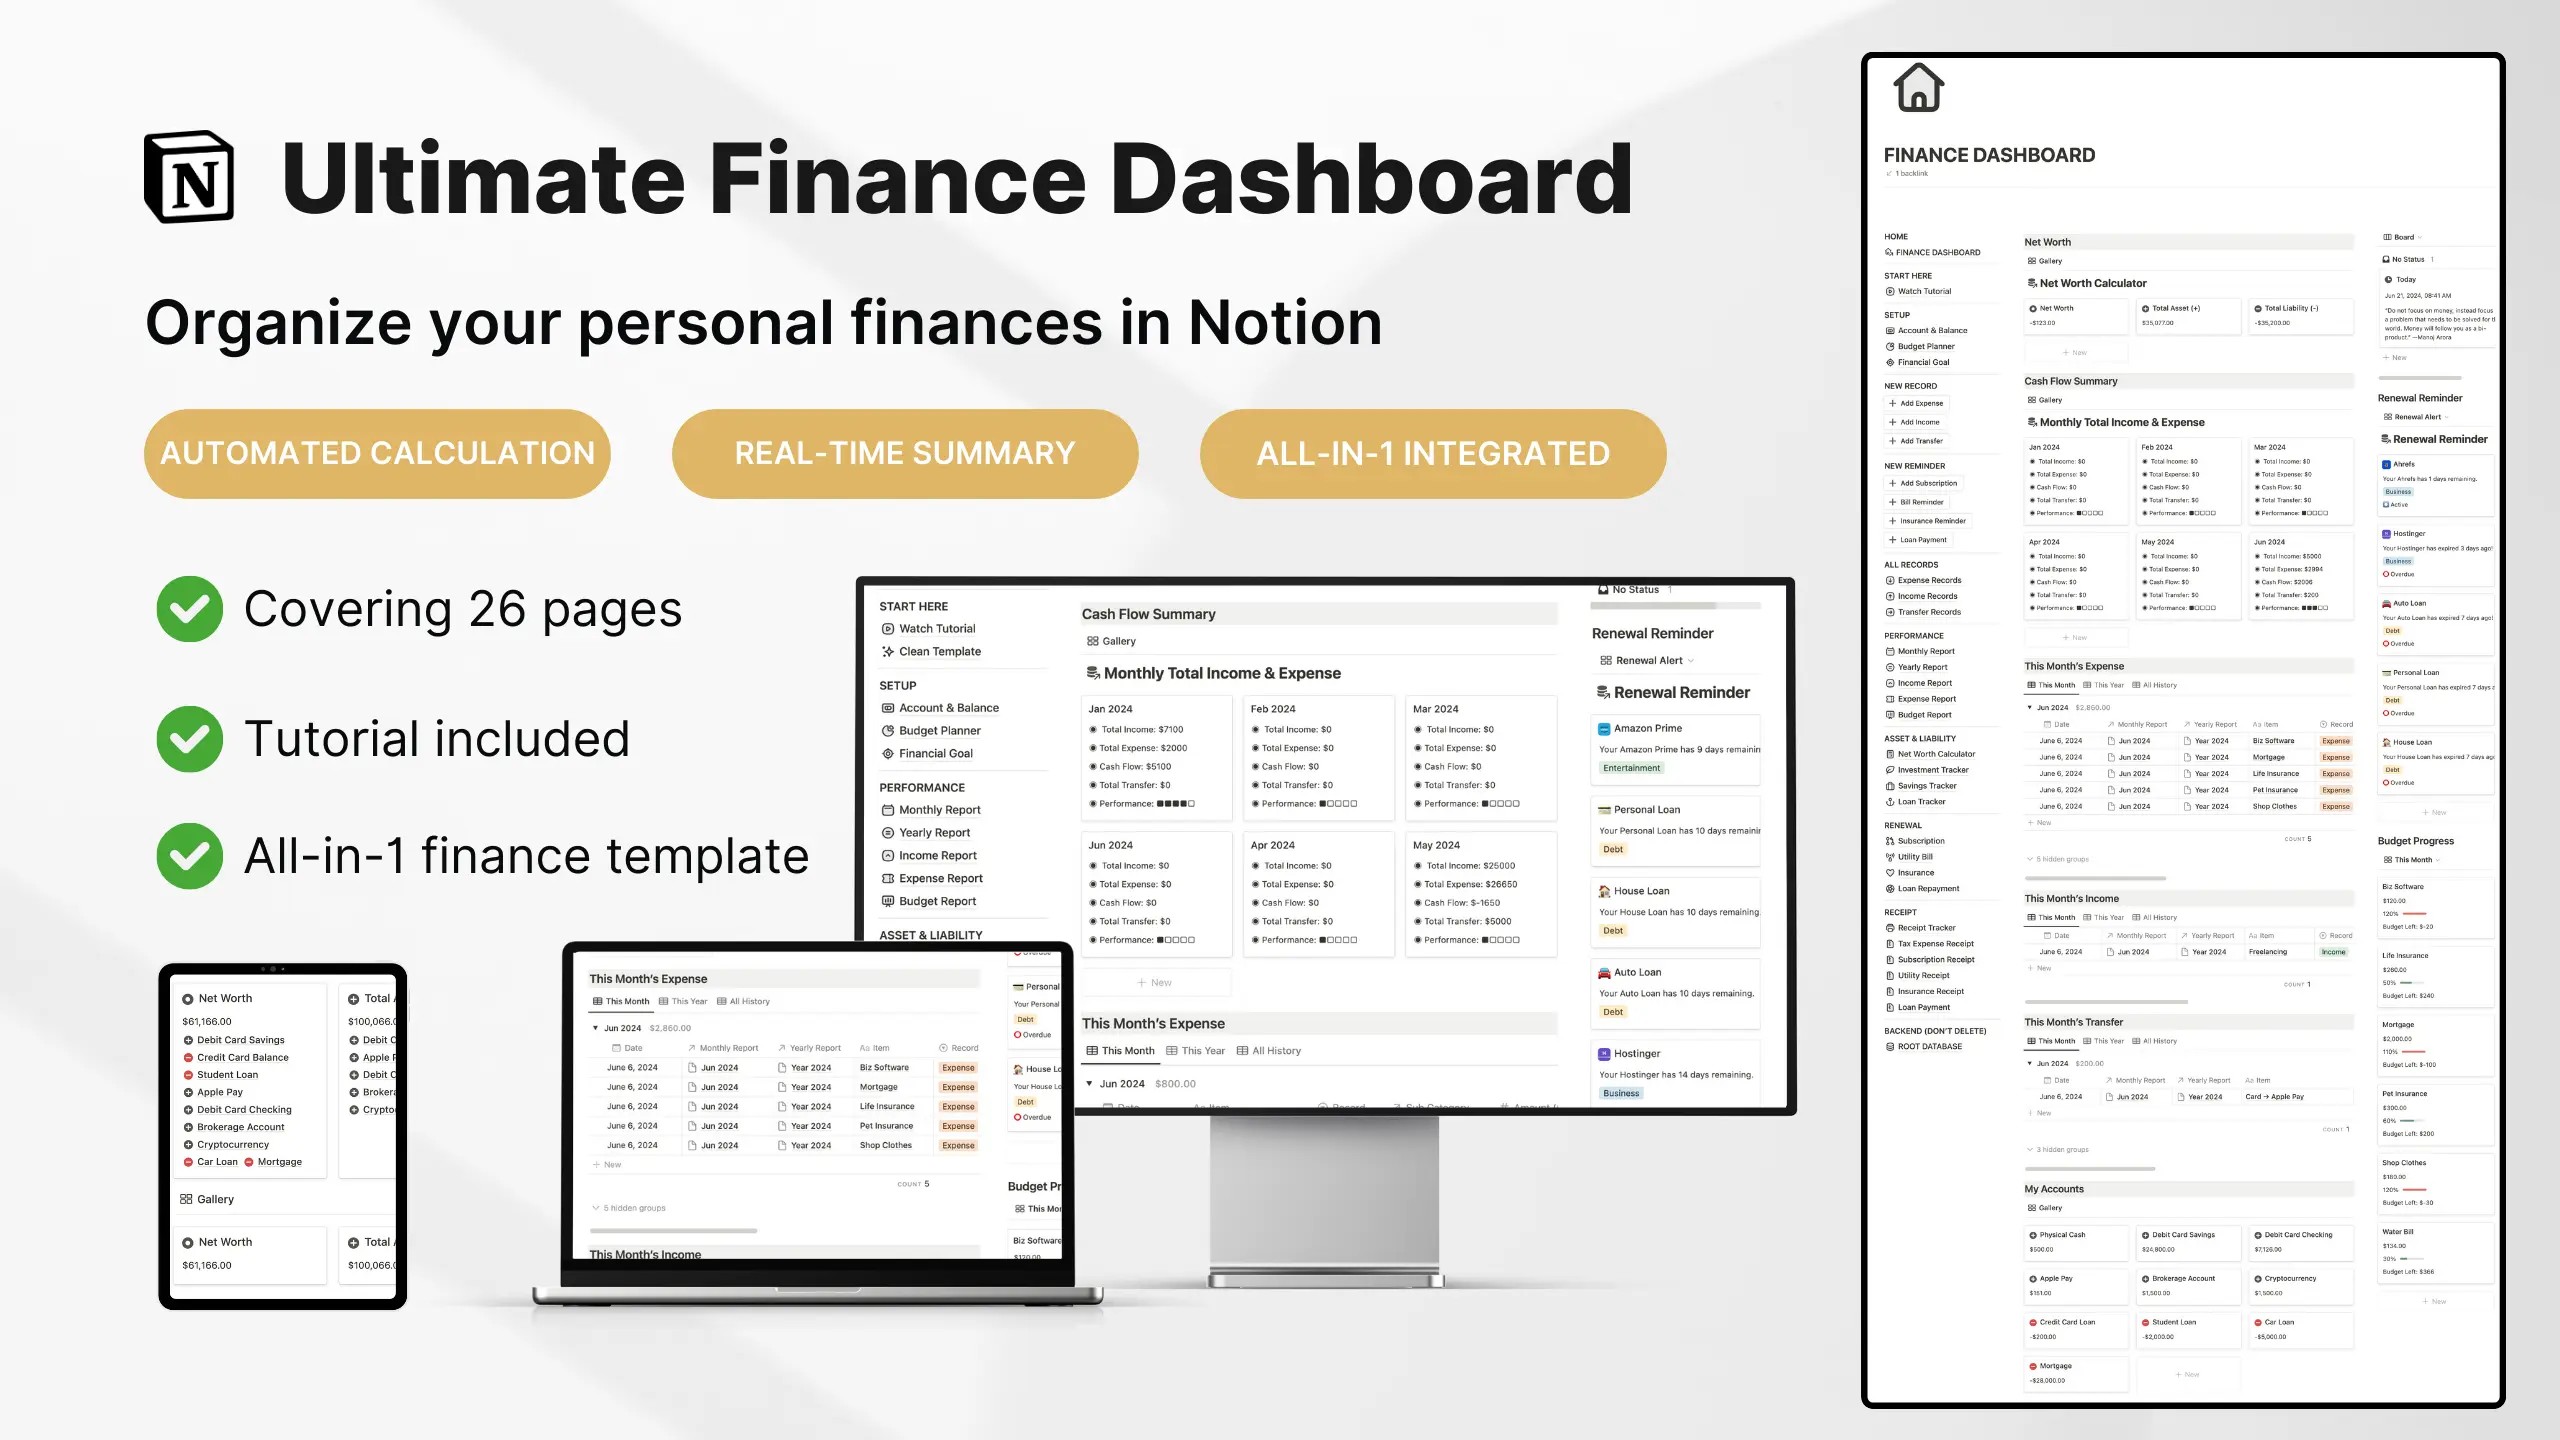
Featured: Notion Finance Tracker Template
If you're looking for a complete setup that combines budgeting, expense tracking, savings goals, debt payoff, and net worth tracking in one workspace, see this Notion Finance Tracker Template.
Break down your expense types
Before you set up the perfect Notion expense tracker, you need to know what kinds of expenses actually run through your life every month.
For most working adults who are serious about managing personal finance, your expenses usually fall into these core types:
1. Daily Necessities
These are the things you must spend on to keep your life running. They’re predictable, recurring, and show up almost every week.
Examples include:
- Groceries
- Transportation (fuel, tolls, train/bus fares)
- Household essentials (cleaning supplies, toiletries)
- Phone bills, utilities, Wi-Fi
- Basic healthcare and pharmacy items
Think of this category as the backbone of your monthly spending — the non-negotiables.
2. Wants & Lifestyle Spending
These expenses make life enjoyable but aren’t strictly necessary. They’re where overspending tends to happen because they feel small in the moment.
Examples:
- Dining out, coffee runs
- Shopping, entertainment
- Hobbies and leisure purchases
- Impulse buys
When tracked properly, you’ll start to see patterns that help you cut back without sacrificing everything you enjoy.
3. Recurring Bills & Subscriptions
These costs repeat every month or year and are easy to forget because they sit on autopay.
Examples:
- Streaming services (Netflix, Spotify, Disney+)
- Cloud storage (iCloud, Google One)
- Gym memberships
- Software subscriptions (Canva, Adobe, Notion itself if paid)
- Domain renewals or web hosting
This category is crucial if you want to avoid “silent expenses” eating your budget.
4. Credit Card Expenses
Even if you use your credit card responsibly, these expenses can easily slip if you don’t have one clear tracking system.
Examples:
- Monthly credit card bills
- Interest or late fees
- Big-ticket purchases split over installments
Tracking these separately helps you see your true monthly spending, not just your card balance.
5. Loan-Related Expenses
If you're paying off debt, this category matters a lot. It also lets you connect your tracking with your long-term financial goals.
Examples:
- Personal loan installments
- Car loan payments
- Student loans
- Mortgage payments
These are usually fixed, but tracking them in Notion helps you stay on top of due dates and progress.
6. BNPL (Buy Now, Pay Later) Payments
This is the modern “silent budget killer.” BNPL splits make purchases look affordable, but when multiple plans stack up, they strain your cash flow fast.
Examples:
- Monthly payments for gadgets, fashion, and lifestyle items
Treat BNPL like any other loan — it’s money you owe, even if it feels small.
7. Insurance Premiums
Insurance payments are often overlooked when tracking monthly expenses, but they take up a significant portion of most adults’ budgets.
Examples:
- Health insurance
- Life insurance
- Car insurance
- Annual premiums that need to be saved for monthly
Including this ensures your tracker reflects your true financial commitments.
Set up your Notion expense database
Once you know your expense types, it’s time to build the core of your entire Notion finance system — your expense database.
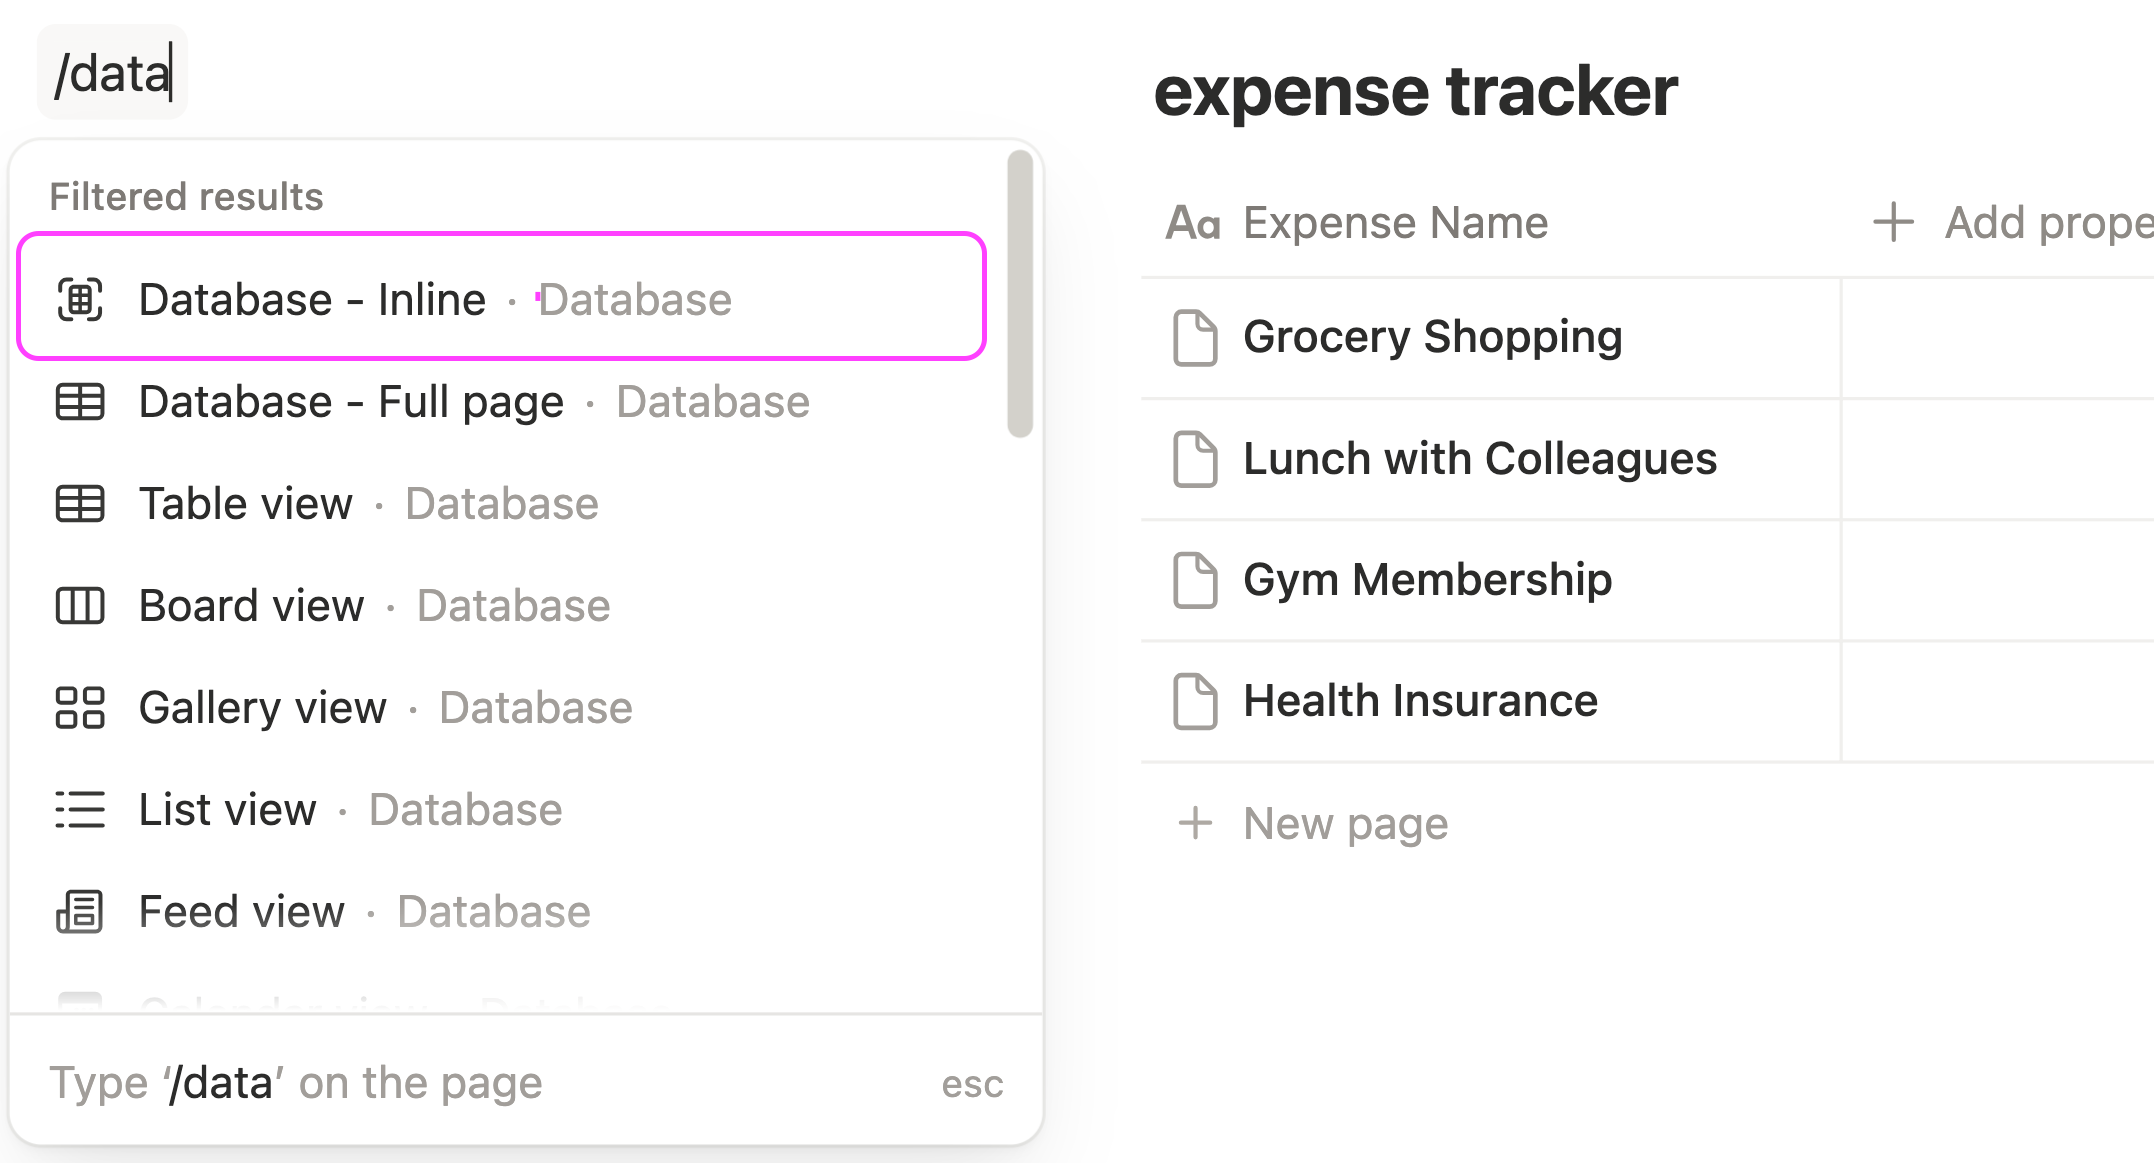
1. Create a New Database
On your Notion page, press the “/” key on your keyboard. Select Inline Database and name it Expense Tracker.
You will now have a table view. Use the Name column to enter the titles of your expenses.
2. Add the Essential Properties
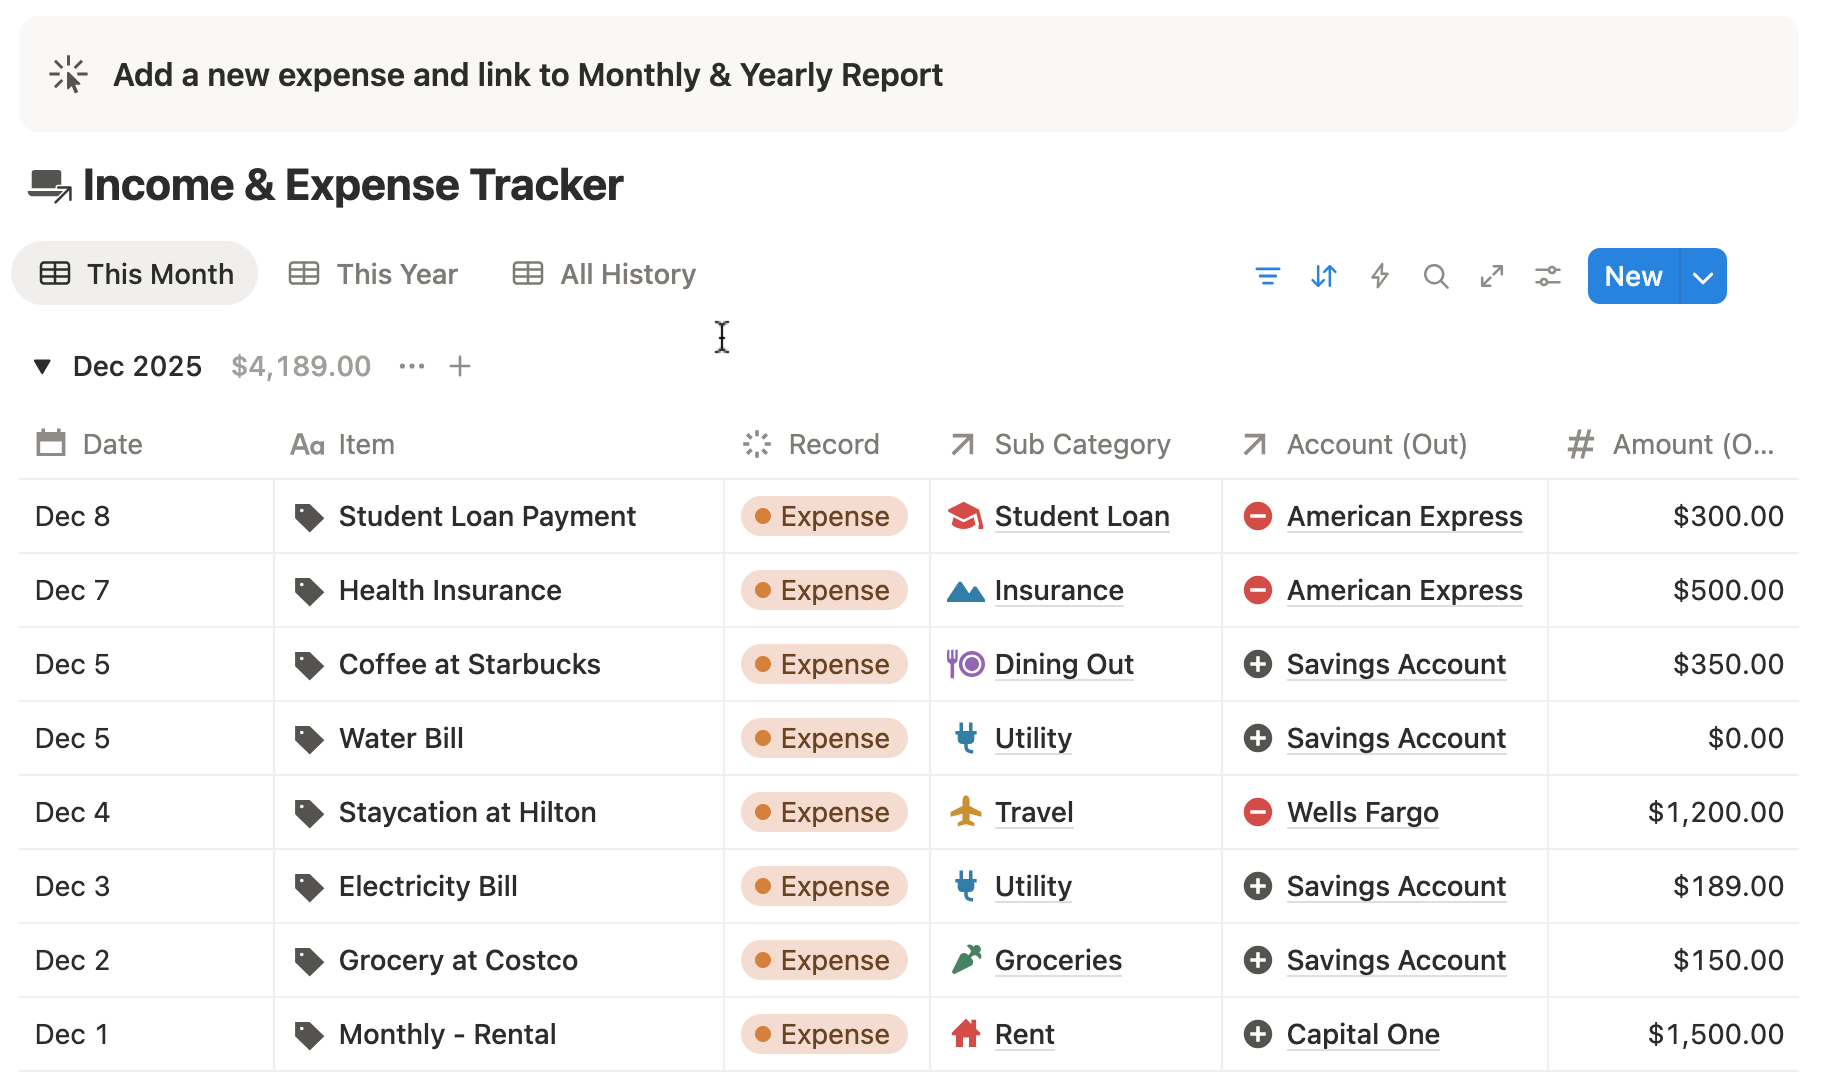
These are the properties every solid Notion expense tracker needs:
- Date — The day you spent the money or when the actual transaction happened.
- Amount (Number property) — Enter how much you spent. Make sure to set the correct local currency under “Edit Property.”
- Main Category (Select property) — Create dropdown options based on the expense types you defined earlier. This helps you analyze spending patterns.
- Custom Tags (Multi-select) — Add more specific labels for the expense, such as “groceries,” “fuel,” or “dining out.”
- Area (Select property) — Mark whether the expense is personal or business-related to help you differentiate them.
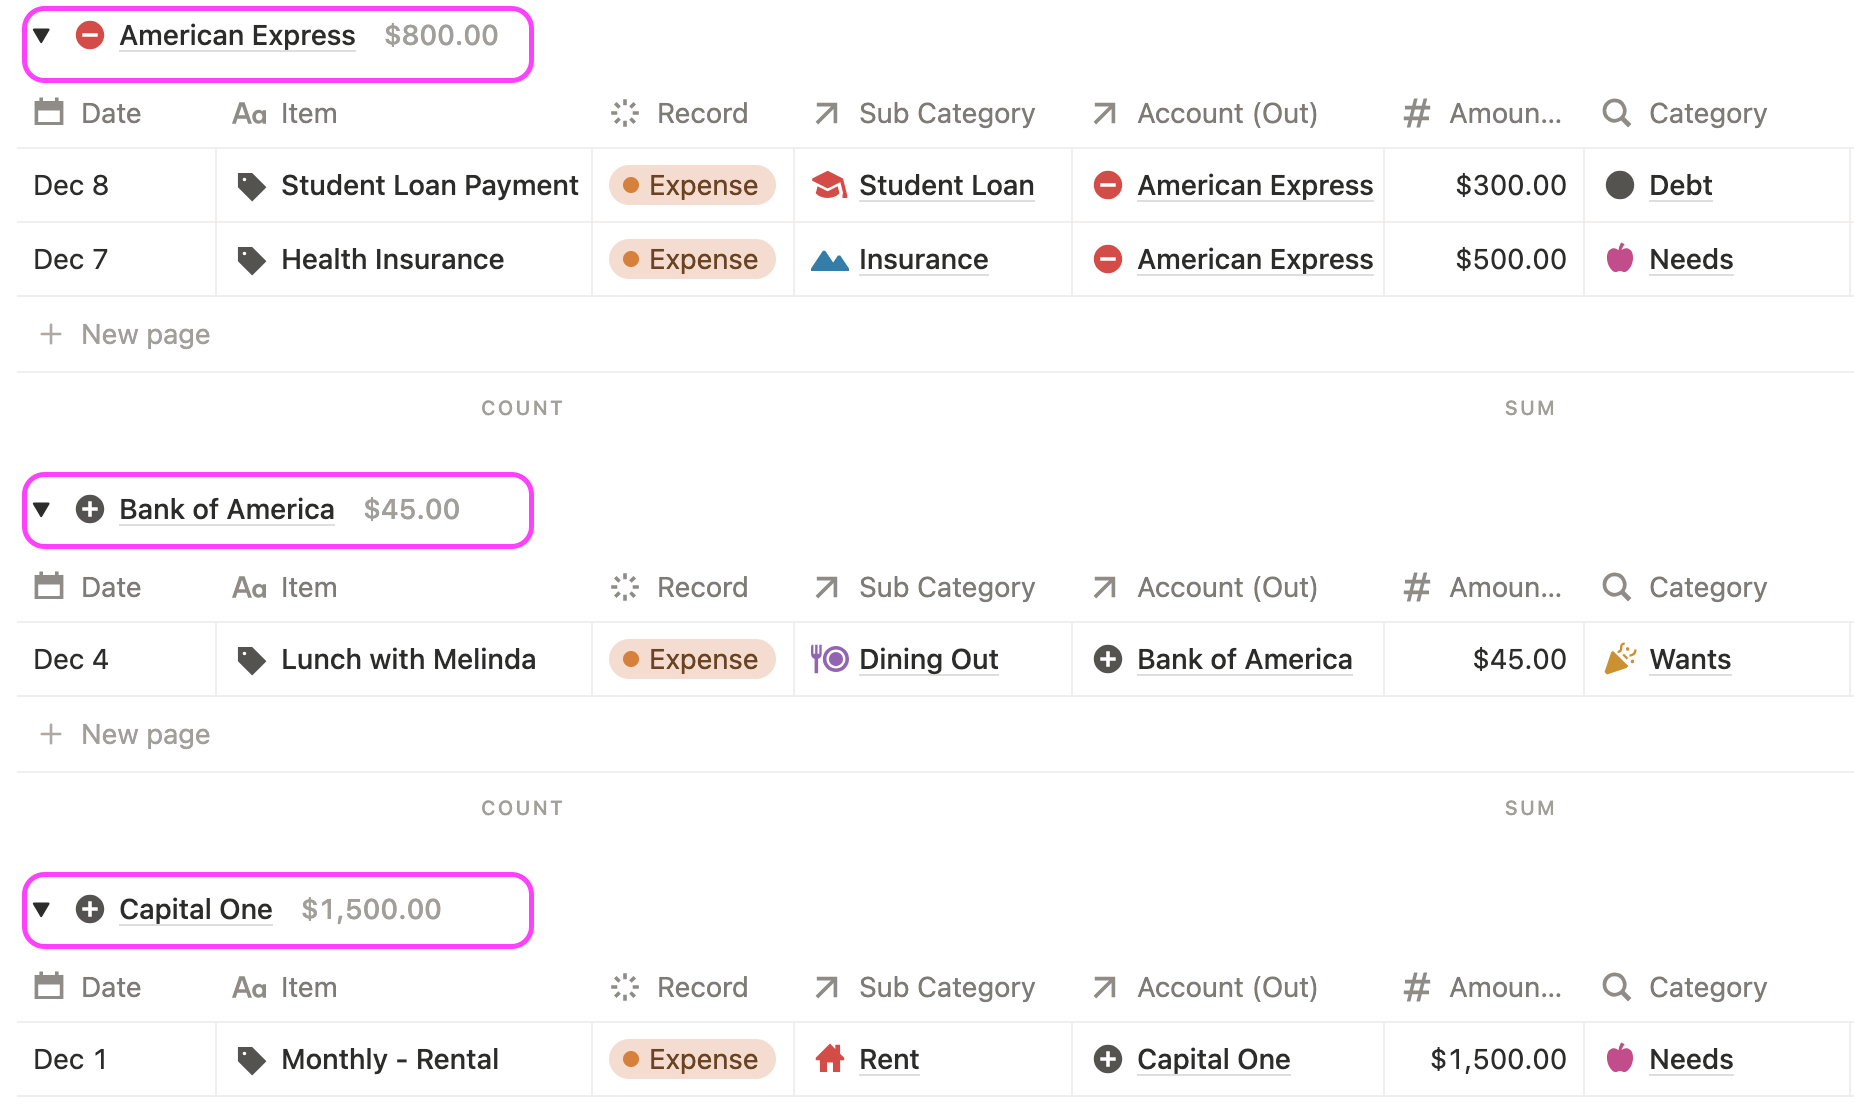
- Payment Method (Select property) — Cash, debit card, credit card, e-wallet, etc. This shows where your money is flowing out from.
- Receipt Upload (Files & media property) — Attach screenshot images, link URLs or PDFs if you prefer keeping everything documented.
- Notes — Add context such as “birthday gift,” “client lunch,” or “Shopee sale.” This makes future reviews more meaningful.
- Recurring? (Checkbox) — Identify monthly bills or subscriptions. Useful for automating reminders later.
- Account (Relation property) — If you manage multiple accounts, link the one the money came from. This gives you better visibility across accounts.
- Cash Flow (Relation property) — Link your expense tracker to your custom monthly finance report to show your total earnings, spending, and savings.
Here’s an example of tracking your daily expenses using this Notion expense database:
Add a simple automation for fast logging
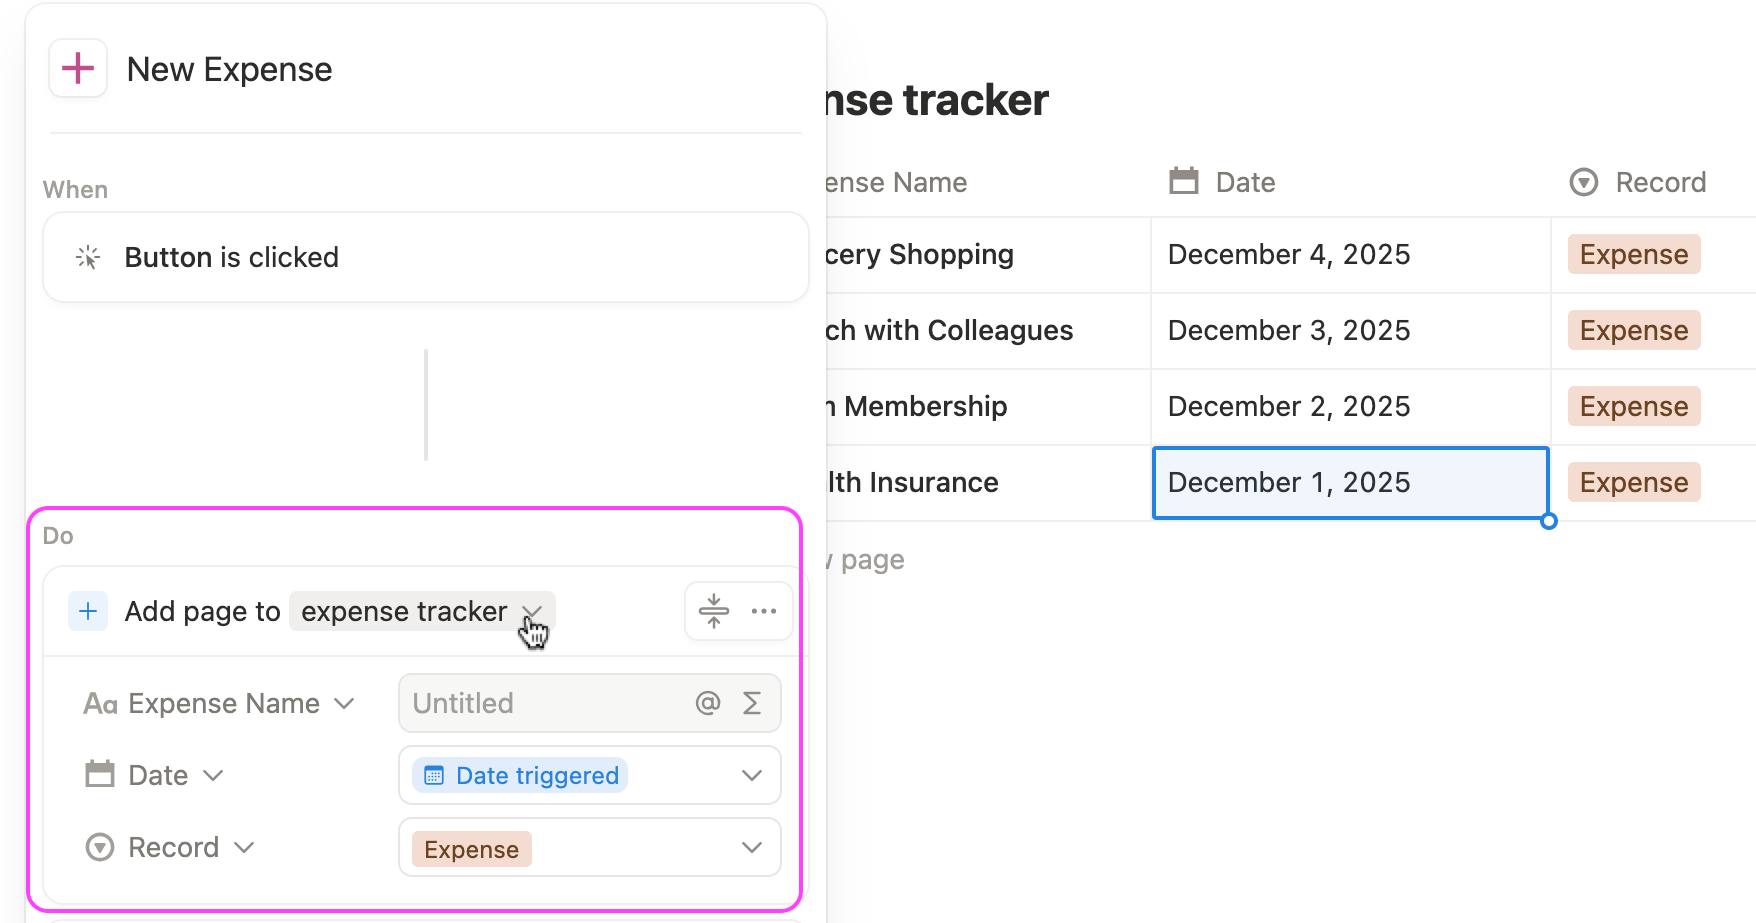
You need a quick way to add new entries without clicking around or filling in the same details over and over.
This is where a one-click Notion button helps.
It speeds up your workflow, reduces friction, and makes expense tracking something you’ll actually stick with.
Follow these steps to create the button:
- Add a Button element, rename it “New Expense,” and choose an icon you like.
- Set it to create a new entry in your Expense Tracker database whenever the button is clicked.
- Edit the properties and select Date Added so it records the actual date of the new entry.
- Add another property for Expense Tag so it can prefill your selected tag automatically.
- Choose the option to open the new page in a center pop-up right after it's created.
- Click Done to save your button.
Create filtered views to make sense of your spending
A long list of transactions can quickly feel overwhelming, especially if you’re trying to understand where your money goes each month.
With filtered views, your expense tracker becomes more than just a list—it becomes a financial dashboard. You’ll be able to:
- Instantly spot spending patterns
- Catch overspending before it spirals
- Track progress toward savings goals
- Prepare for debt repayment or big purchases
Filtered views let you focus on insights, not just numbers, making your Notion tracker a tool you actually enjoy using.
Here are the different types of custom views you can create in your Notion database
1. Create a “This Month” View
Having a view that shows only your expenses for the current month helps you stay focused and track every dollar more accurately.
It cuts out the noise and lets you see exactly how much you’ve spent so far.
To set this up, filter your database to show only expenses where the Date falls within the current month.
2. Break Down Spending by Category
Understanding where your money goes is key to identifying which areas you tend to overspend. When you categorize your expenses properly, you’ll immediately see which parts of your life take up the biggest portion of your budget.

3. Payment Method or Account
If you pay with a credit card, you may want to filter your expenses by payment method to see how much you charge to each card every month.
Filter your expenses by payment method or account to see how much you spend through cash, credit cards, BNPL, or e-wallets each month.
This helps you understand if you’re relying on future money rather than funds you already have.
4. Recurring Bills & Subscriptions
Identify any expenses that repeat every month or year—such as entertainment services, business software, online tools, or other subscription-based providers.
Filter your database to show only items marked as Recurring using the checkbox property.
This view highlights your fixed monthly commitments and helps ensure you never miss a payment.
5. Show Past Expense Entries
This custom view aggregates all your past monthly expenses and automatically calculates your total spending month over month.
It helps you spot trends, track how your spending habits change over time, and see clearly whether you’re improving or overspending in any period.
6. Create a “Biggest Expenses” View
Filter your database to show expenses above a certain threshold or sort your table by Amount in descending order.
You can also use Notion’s Conditional Highlighting feature to color-code rows—for example, highlight any expense in red if it exceeds a specific amount.
This view makes it easy to spot large purchases quickly and evaluate whether they align with your financial goals.
Sync your notion expense tracker with auto-reporting
With the Ultimate Notion Finance Template, your expense tracker isn’t just a standalone table — it’s part of a fully connected financial system.
Every expense you log can automatically feed into other databases and dashboards, giving you a complete, real-time picture of your finances.
Here’s how it works:
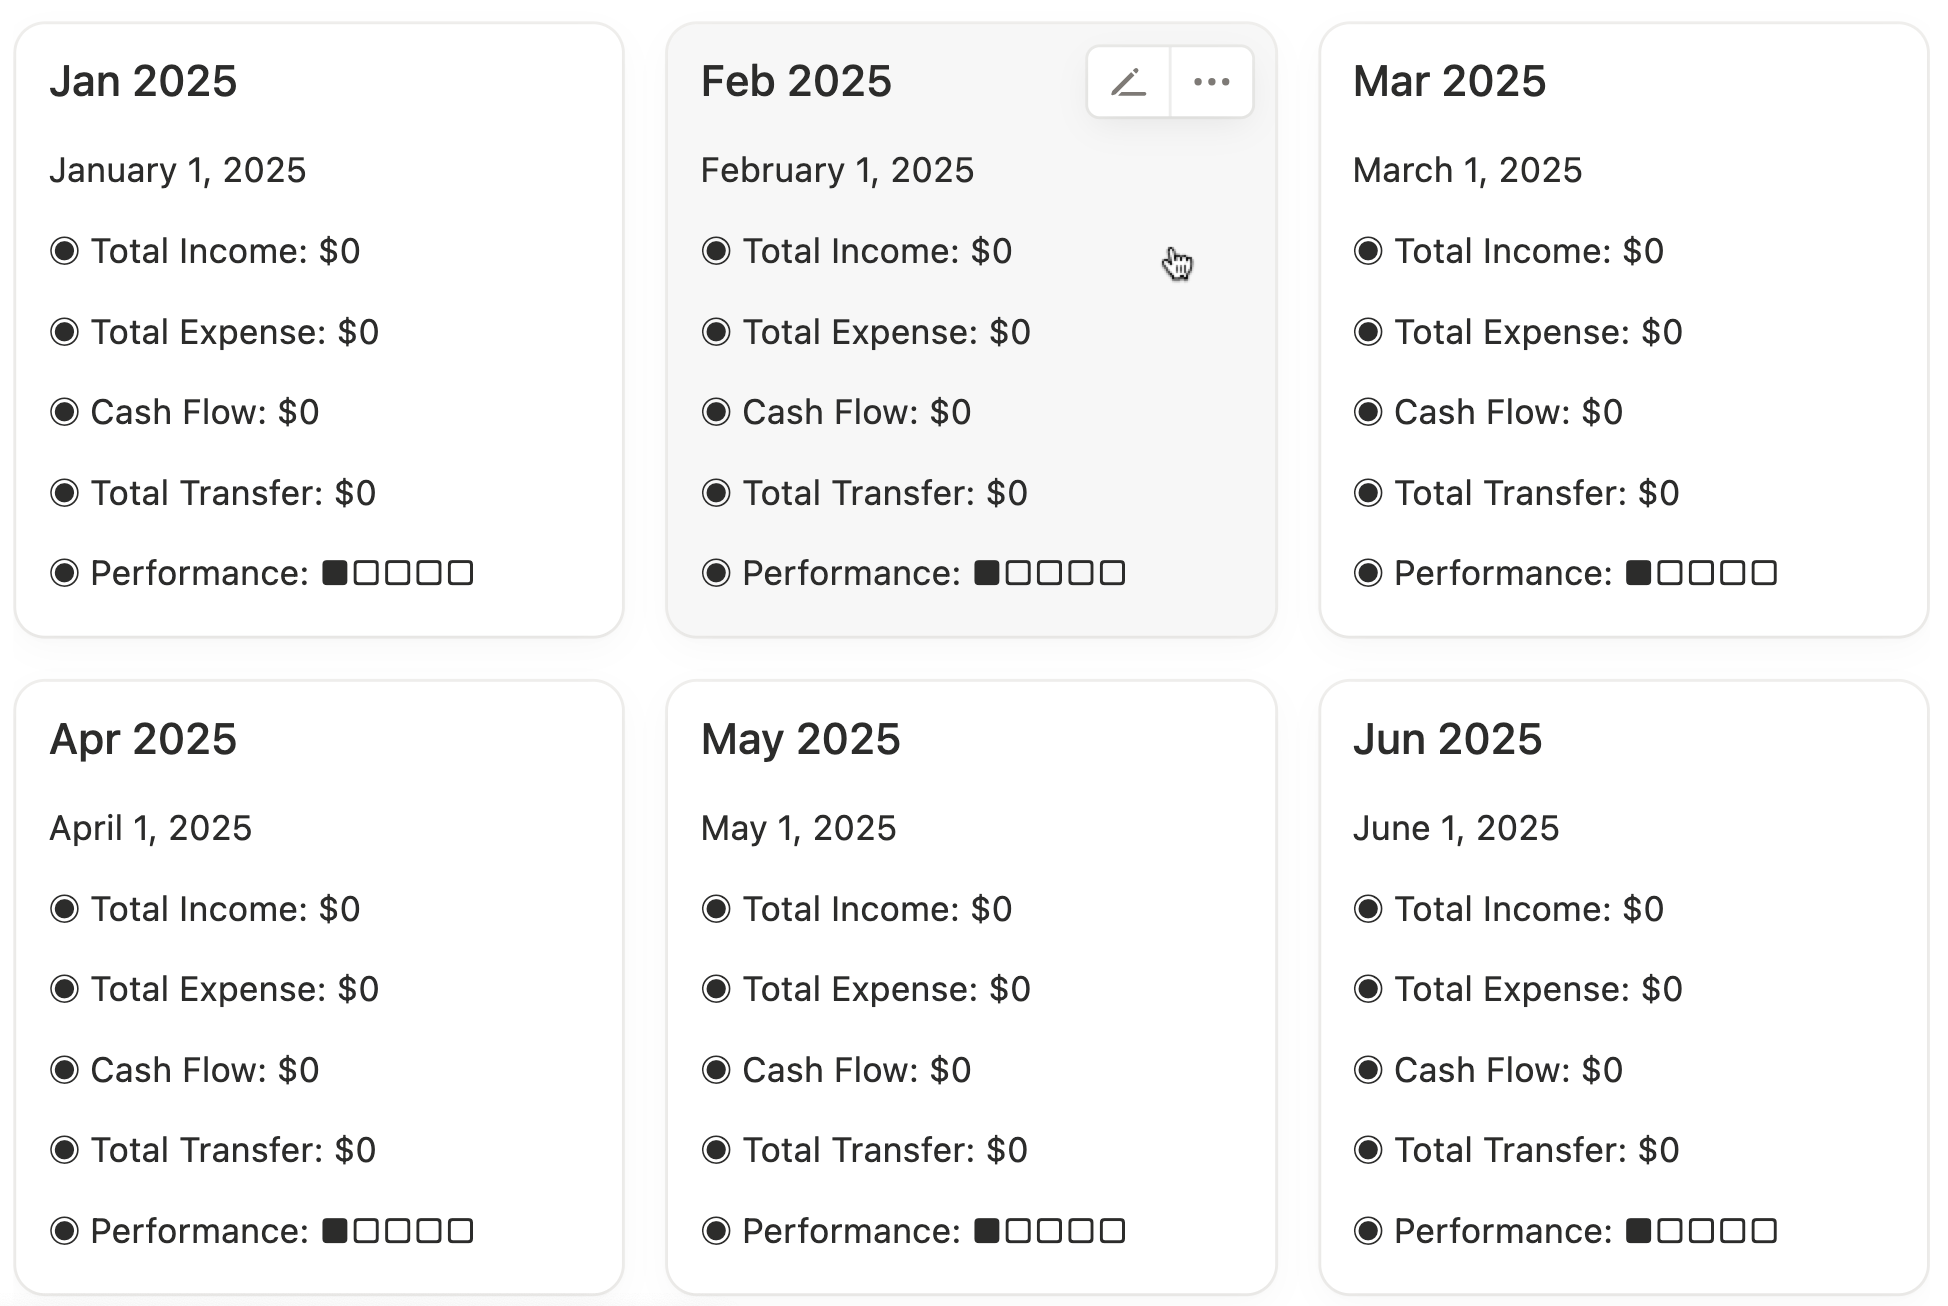
1. Link Expenses to Your Cash Flow Report
Every transaction you enter in your expense tracker automatically updates your Cash Flow Report, showing exactly how much money is coming in, going out, and what remains. This eliminates manual calculations and gives you a live snapshot of your financial health.
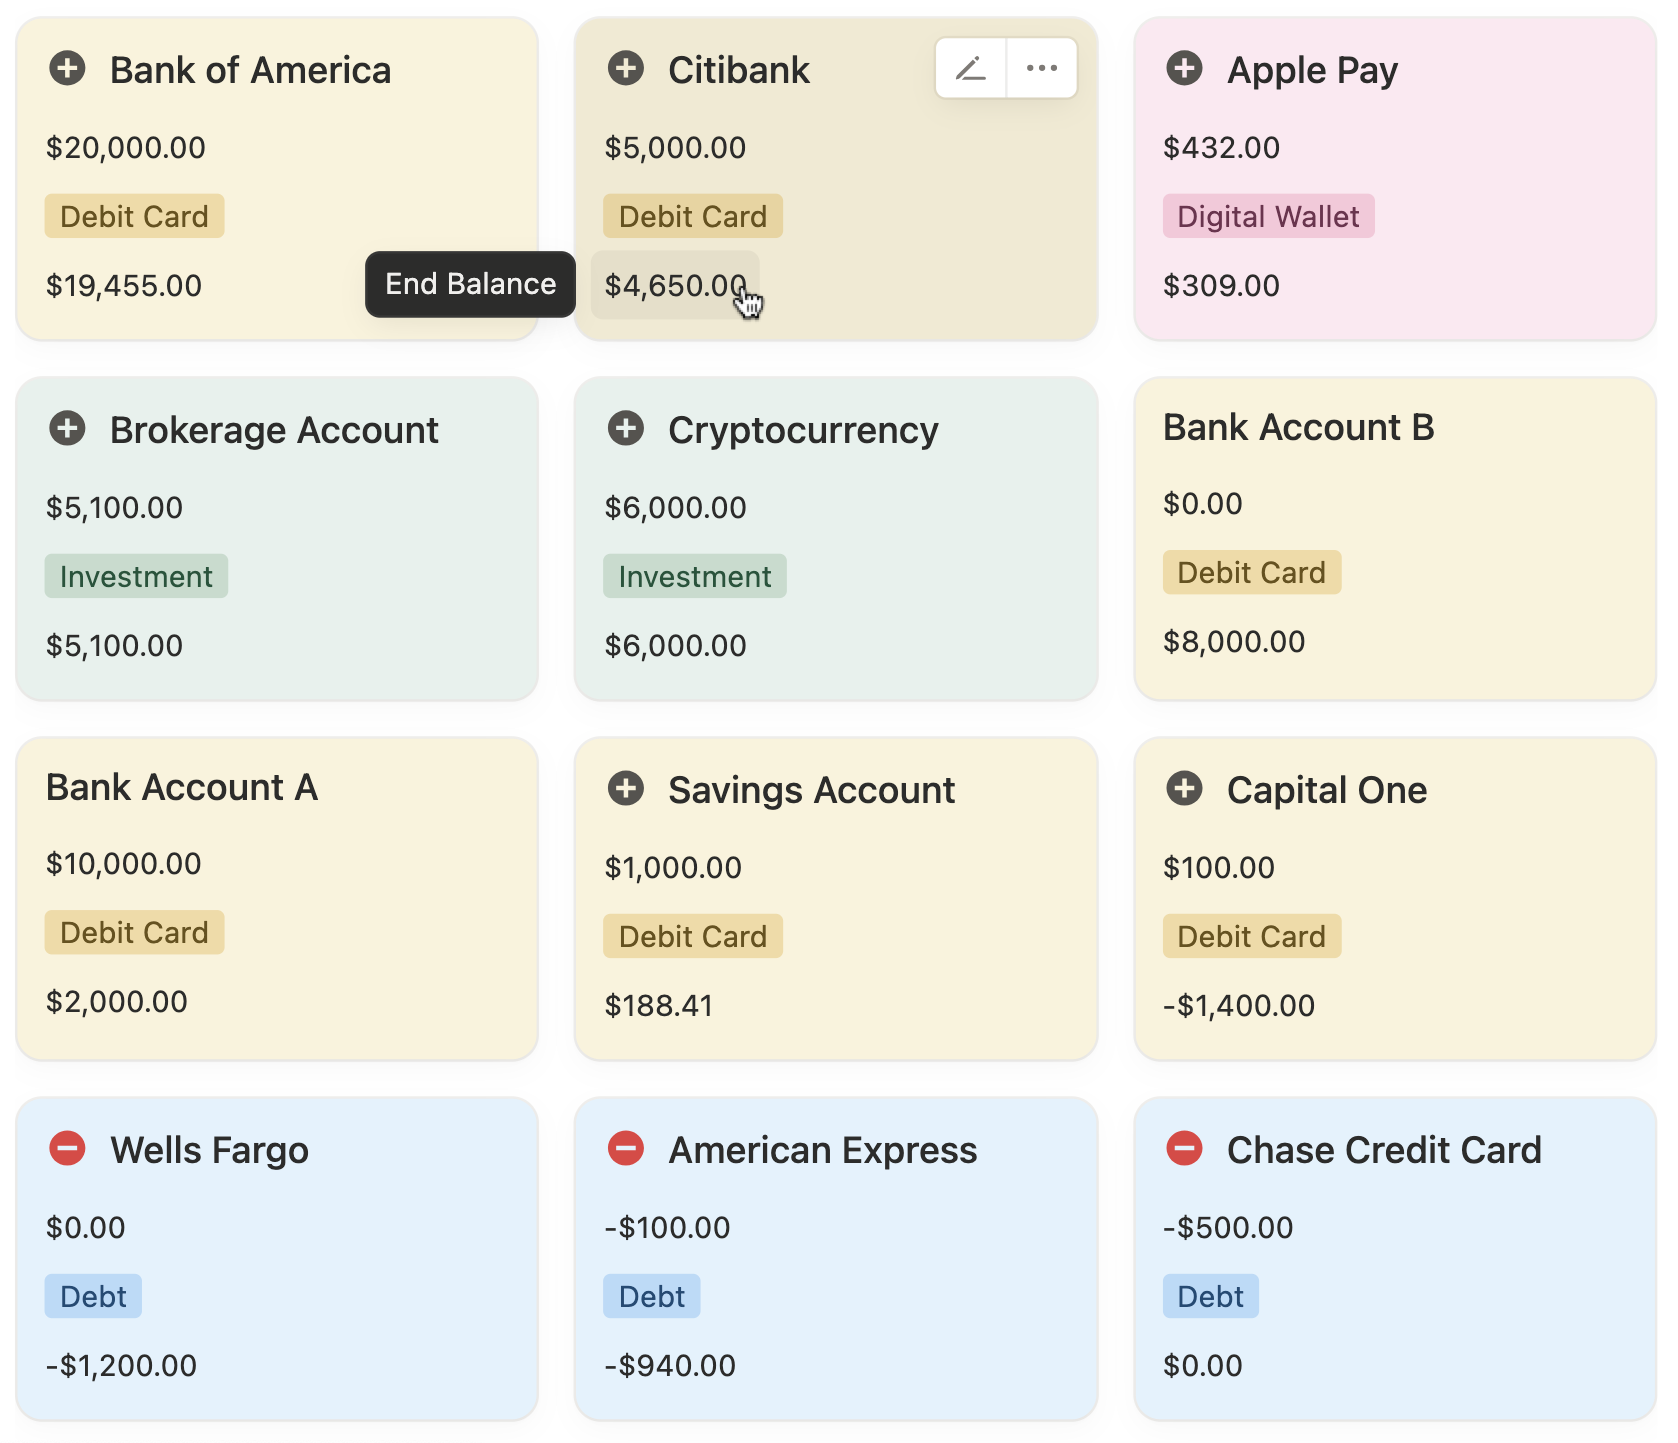
2. Update Your Account Balances Automatically
Expenses logged in your tracker instantly adjust your account balances across multiple accounts — whether it’s a bank account, credit card, or e-wallet. You’ll always know your current balance without checking multiple apps or statements.
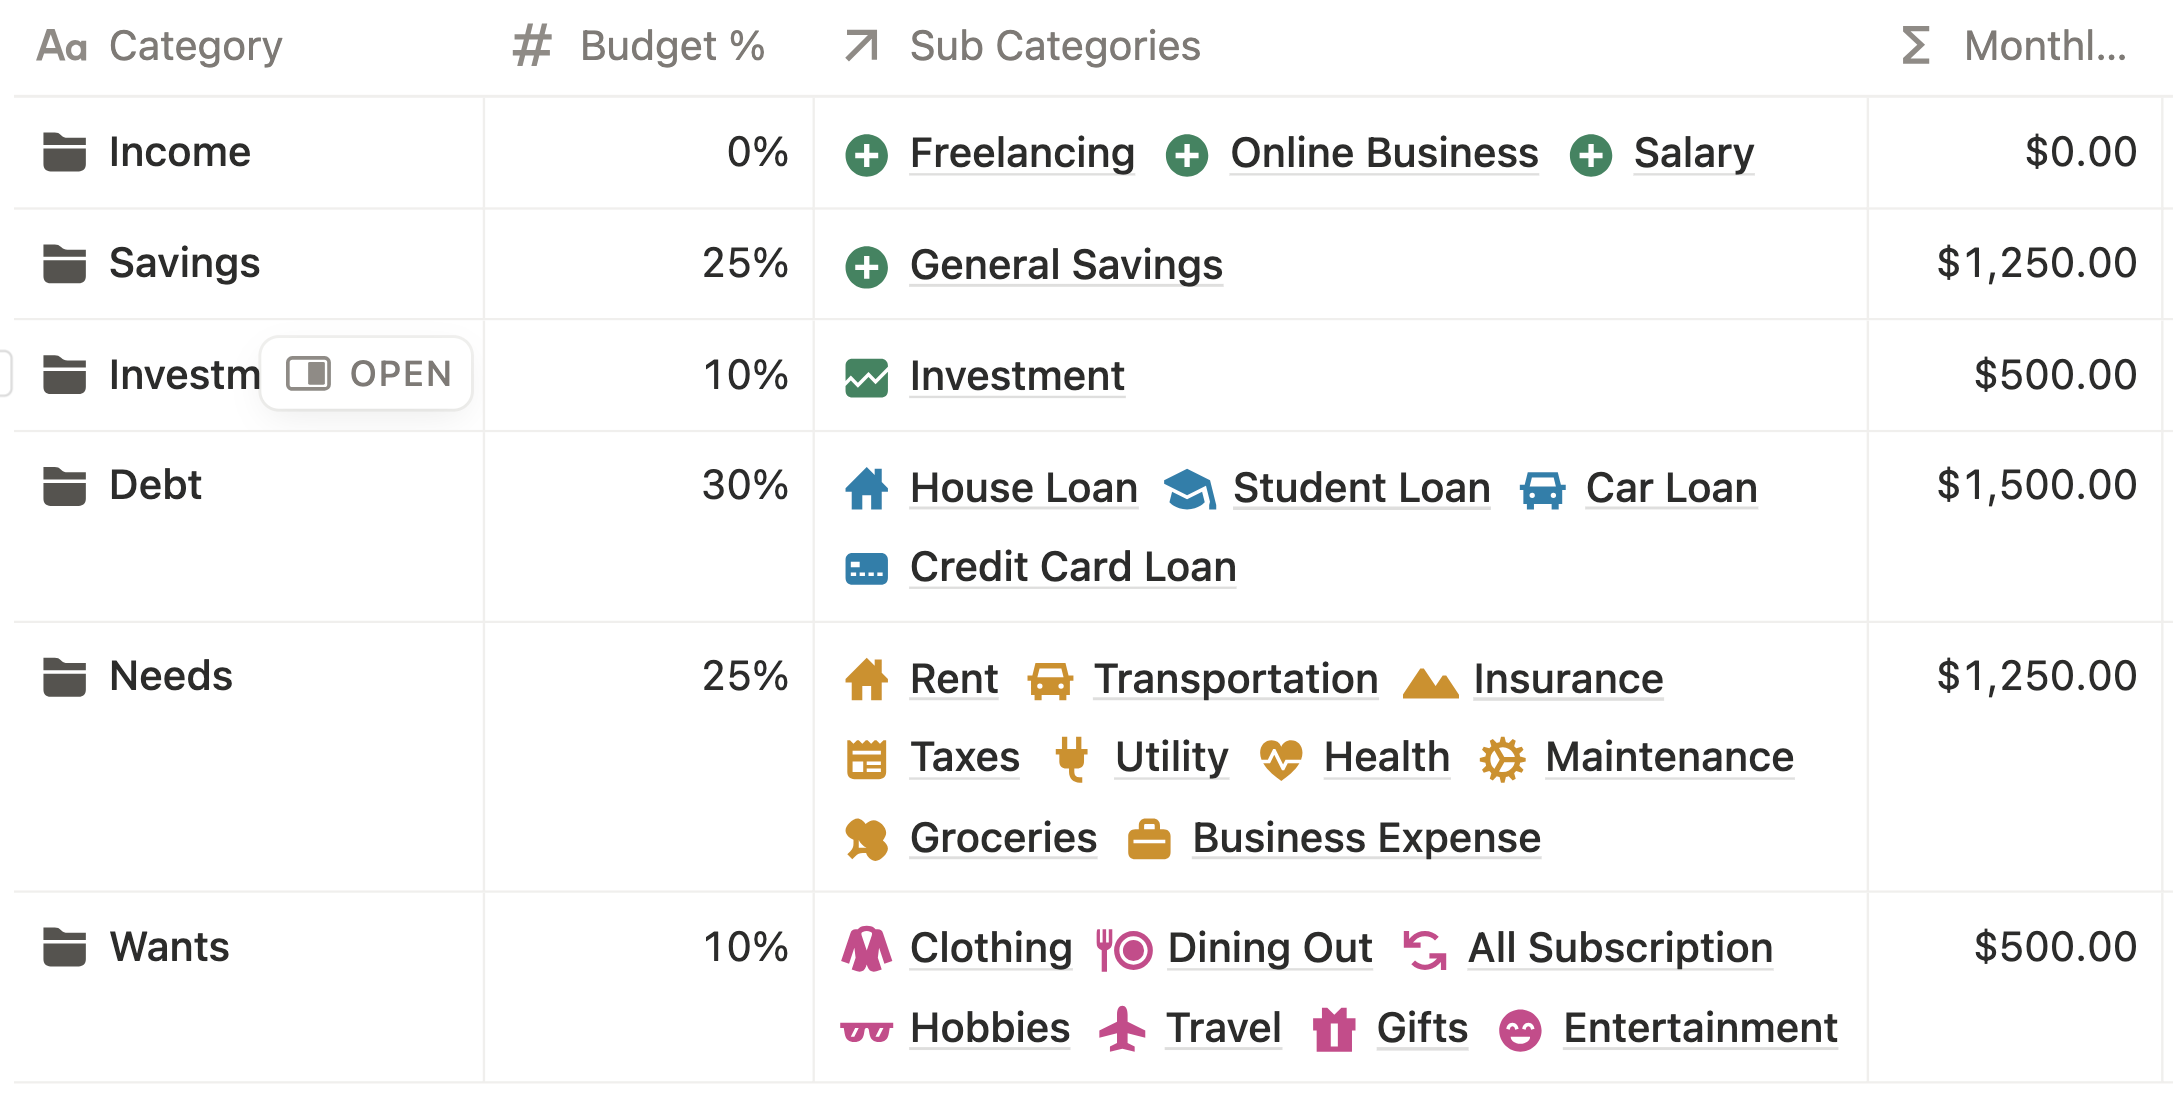
3. Sync with Your Budget Planner
Your logged expenses feed directly into your Budget Planner Template, letting you see whether you’re staying within your monthly limits or overspending in certain categories. This automated connection makes budget tracking effortless and accurate.
4. Track Your Financial Goals in Notion
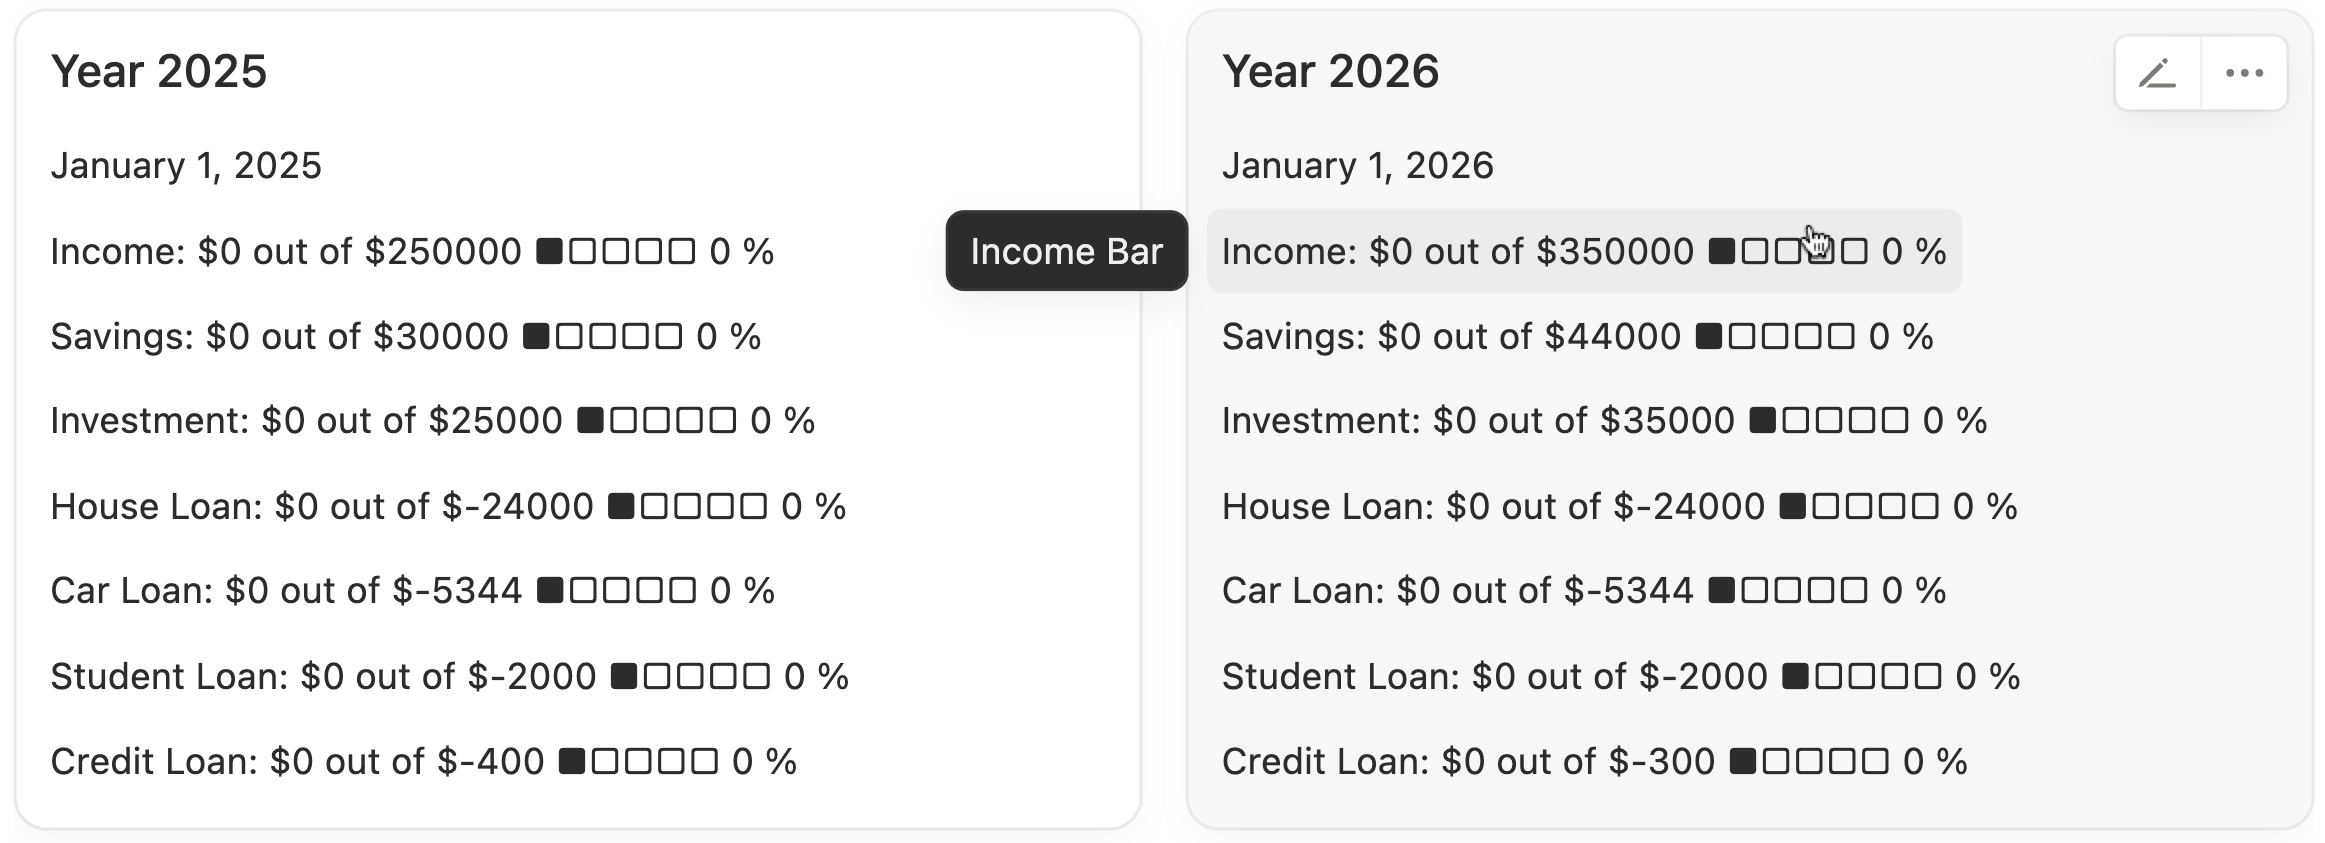
Logging expenses is powerful, but if your spending isn’t tied to your financial goals, it’s easy to lose sight of what really matters. That’s where a Financial Goals Tracker comes in. With the Ultimate Notion Finance Template, you can connect your expense tracker to your goals, giving you real-time insight into how every dollar impacts your progress.
5. Connect with Loan Tracker
If you’re managing loans, your expense tracker can link with your Loan Tracker Database. Payments you log against loans automatically update your outstanding balance, repayment progress, and due dates. This keeps your debt management fully organized in one system.
Frequently asked questions
1. How do I track my monthly expenses in Notion?
You can track monthly expenses in Notion by creating an expense tracker database. Add properties like Date, Amount, Main Category, Payment Method, and Notes. Use filtered views like “This Month” or “Biggest Expenses” to organize your spending and see where your money goes. This method replaces scattered spreadsheets and apps, giving you a clear view of your personal finances.
2. What are the best expense categories to track in Notion?
Core categories include Daily Necessities, Housing, Transportation, Wants & Lifestyle Spending, Recurring Bills & Subscriptions, Credit Card Expenses, Loan Payments, BNPL, and Insurance Premiums. Breaking down expenses this way helps you identify overspending patterns and better manage your budget in Notion.
3. How can I automate expense logging in Notion?
You can automate logging by adding a Button element to your Notion page. Configure it to create a new expense entry with pre-filled details like Date, Expense Tag, and Amount. This one-click method speeds up tracking and reduces friction, ensuring you log every expense consistently.
4. How do filtered views help me understand my spending in Notion?
Filtered views allow you to organize transactions by month, category, payment method, recurring expenses, or biggest purchases. They turn your raw data into actionable insights, helping you spot trends, manage budgets, and stay on track with savings and loan repayments.
5. Can I connect my Notion expense tracker to my budget or cash flow reports?
Yes. Using the Ultimate Notion Finance Template, your expense tracker can sync with Cash Flow Reports, Account Balances, and Budget Planner templates. This integration automatically updates totals, shows where your money is going, and helps you monitor budget compliance in real time.
6. How can I track financial goals using my Notion expense tracker?
Connect your expenses to a Financial Goals Tracker. Assign each expense to a goal like Emergency Fund, Vacation, or Debt Repayment. Rollups can calculate progress automatically, showing you how every transaction impacts your goals, and conditional formatting can highlight milestones or shortfalls.
7. How do I monitor credit card, BNPL, or loan payments in Notion?
Use Payment Method and Loan Tracker relations. Filter by credit card, BNPL, or loan category to track usage and due payments. Expenses automatically update balances and repayment progress, helping you avoid late fees and overspending.
8. What are the key benefits of using Notion for expense tracking over spreadsheets or apps?
Notion centralizes all your financial data, connecting expenses to budgets, cash flow, and financial goals. It supports automated updates, filtered views, visual dashboards, and rollups—features spreadsheets often lack. This makes tracking, analysis, and goal-setting easier, giving you a clear and organized personal finance system.